Developing a Real-Life Project
by Dr. Phil Winder , CEO
I’m often asked questions in the vain of “how did you figure that out?”. Other times, and I’m less of a fan of these, I get questions like “you estimated X, why did it take 2*X?”, which I respond with a definition of the word estimate. Both of these types of questions are about the research and development process. Non-developers, and especially non-engineers, are often never exposed to the process of research and development. It’s highly non-linear; when it’s going well progress is rapid, but other times you get stuck after falling down a rabbit hole.
For one of my reinforcement learning projects I needed a library to communicate with some new servos. I thought it might be interesting to publish a log of that initial development to demonstrate what goes into building a project from scratch.
My New Book on Reinforcement Learning
Do you want to use RL in real-life, business applications? Do you want to learn the nitty-gritty? The best practices?
I've written a book for O'Reilly on Reinforcement Learning. It focuses on industrial RL, with lots of real-life examples and in-depth analysis.
Find out more on https://rl-book.com.
This is a Python library, so I expect you to have some experience with that and as usual I do not want to print reams of code, so I’ve linked the repository throughout the text. I recommend that you look at the commits when I present them in the text to follow my thoughts. There are five main phases: get it working, don’t repeat yourself, creating abstractions, separating classes and release.
Phase 1 - Get It Working
Your number one focus should always be to get stuff working. Do not waste time on prettiness or fanciness. Your time is expensive and both you and your stakeholders (e.g. wife) need rapid feedback. Without this both they and you will lose confidence in what you are doing.
Repository Setup
First I like to create a blank repo with a readme (if it doesn’t exist already). This reminds me to keep git pushing, which is my basic but very useable disaster recovery strategy.
Next, I need to setup my build chain. There are lots of opinions and tooling is changing/improving on a weekly basis. I use pyenv for Python version management. Setting the Python version to the most recent (pyenv local 3.8.2) is the first step to defining my build.
One common Python complaint is that dependency management is hell. I like to use a tool called Poetry which is based upon the pyproject.toml proposal (PEP-518). So after doing a poetry init and adding some dependencies that I know I will need (like pyserial for serial communication and pytest and black for development) then I’m ready to go. At this point I will spin up by development environment and make sure it is using the virtual environment that poetry install has created.
First Code
In my first hypothesis for this post, I propose that the probability of project failure is proportional to the amount of time it takes to go from nothing to something you can show your kids.
It is vitally important to have something working as quickly as possible. The best way to do this, and this is why Python is so great, is to write a quick script. Define what you want to do and write a single script, entirely procedural, no functions, no classes, nothing (shock!).
So I create a main.py in the root of my repository and start hacking away. First I want to read the position of the servo (mine is a digital serial servo with position feedback - yay!) then make the servo move. I am confident that this will impress my 5-year old (and me).
This is where I dig out the communication protocol datasheet (after emailing Hiwonder support - this shouldn’t be necessary!) which was provided to me in a dropbox folder 🤷. I know right? It doesn’t inspire confidence. The PDF is included in the repository.
Unfortunately the protocol doesn’t have a termination sequence, so that makes it difficult to read because you don’t know how long the packet is going to be without parsing the packet. I’ll just do a read and rely on the timeout for now. Maybe we can do something smarter later.
And after getting those bytes in the right order, I can read the position! A job well done. The response from this code is:
2020-06-12 09:23:19.714 | DEBUG    | __main__:<module>:9 - b'UU\x01\x03\x1c\xdf'
2020-06-12 09:23:19.715 | DEBUG    | __main__:<module>:10 - 6
2020-06-12 09:23:20.719 | DEBUG    | __main__:<module>:14 - b'UU\x01\x05\x1c\xec\x01\xf0'
2020-06-12 09:23:20.719 | INFO     | __main__:<module>:18 - The current position of servo 1 is: (496,)
Now we need to write a position. Shouldn’t be too difficult? Copy/paste? Not quite. The API is a bit confusing, but it turns out you have to issue a command to move at a specific time, where the time is 0. It takes a second to move the servo. So we need a small delay in there too. The result of this code is below.
2020-06-12 10:40:55.210 | DEBUG    | __main__:<module>:11 - b'UU\x01\x03\x1c\xdf'
2020-06-12 10:40:55.212 | DEBUG    | __main__:<module>:12 - 6
2020-06-12 10:40:56.216 | DEBUG    | __main__:<module>:16 - b'UU\x01\x05\x1c.\x03\xac'
2020-06-12 10:40:56.216 | INFO     | __main__:<module>:20 - The current position of servo 1 is: (940,)
2020-06-12 10:40:56.217 | DEBUG    | __main__:<module>:24 - b'UU\x01\x03\x01\xfa'
2020-06-12 10:40:56.217 | DEBUG    | __main__:<module>:25 - 6
2020-06-12 10:40:57.218 | DEBUG    | __main__:<module>:32 - b'UU\x01\x03\x1c\xdf'
2020-06-12 10:40:57.219 | DEBUG    | __main__:<module>:33 - 6
2020-06-12 10:40:58.224 | DEBUG    | __main__:<module>:37 - b'UU\x01\x05\x1c\xfd\x00\xe0'
2020-06-12 10:40:58.225 | INFO     | __main__:<module>:41 - The current position of servo 1 is: (224,)
Awesome. That’s it for the first phase.
Phase 2 - Don’t Repeat Yourself (DRY)
I spent quite a lot of time designing those hex command strings. That was painful. So my first job is to come up with a method to automatically create those strings for me. At first I started writing my own method, but then I thought, “converting bytes to known packet formats must be a thing?” So I did a bit of googling and found the construct library. This is a library that allows you to define binary command structures.
Defining a Command Structure
I defined a command structure to match the datasheet. It’s a lot more understandable now, but I’m still having to calculate the hex values manually. I’m getting too old for that, so next I will create a function to populate that information for me, given an id, command and data.
The benefit of doing this is immediate. I can now pass in any position I like and make it wiggle about.
It is at this point that I realised that I was parsing the read value incorrectly. It took me a few minutes to figure this out. The first problem was that I used the wrong byte position and the second was that the number is represented in c-style twos-compliment. Python has a library called ctypes that allows me to convert. After that I quickly wrote a function and added a simple inline test!
The last thing to do, to prevent those byte position-related issues is to use the construct structure to parse the packet too. After that it’s pretty robust, but is starting to look a little bit messy.
2020-06-12 11:53:59.391 | DEBUG    | __main__:<module>:56 - b'UU\x01\x03\x1c\xdf'
2020-06-12 11:53:59.391 | DEBUG    | __main__:<module>:57 - 6
2020-06-12 11:54:00.396 | INFO     | __main__:<module>:62 - Read: Container:
    header = b'UU' (total 2)
    id = 1
    length = 5
    command = 28
    data = b'\xbf\x02' (total 2)
    checksum = 28
2020-06-12 11:54:00.396 | INFO     | __main__:<module>:63 - The current position of servo 1 is: 703
2020-06-12 11:54:00.396 | DEBUG    | __main__:<module>:67 - b'UU\x01\x05\x01\xbc\x02:'
2020-06-12 11:54:00.397 | DEBUG    | __main__:<module>:68 - 8
2020-06-12 11:54:01.402 | DEBUG    | __main__:<module>:75 - b'UU\x01\x03\x1c\xdf'
2020-06-12 11:54:01.403 | DEBUG    | __main__:<module>:76 - 6
2020-06-12 11:54:02.407 | INFO     | __main__:<module>:81 - Read: Container:
    header = b'UU' (total 2)
    id = 1
    length = 5
    command = 28
    data = b'\xbf\x02' (total 2)
    checksum = 28
2020-06-12 11:54:02.408 | INFO     | __main__:<module>:82 - The current position of servo 1 is: 703
Refactoring Into Helper Methods
When you see or feel like the code is getting “messy”, this is the time to refactor into helper functions. But note that you don’t want to do this until you can actually see code repeating itself. It’s very easy to fall into a trap of premature optimisation and start creating helper methods/classes before you actually need them. This just makes the code more complicated to follow. Another way I’ve heard this described is if you can’t fit one logical block of work on a single screen without scrolling, then it’s time to use methods. The total line count might increase, but the blocks of code that are doing work will be easier to parse by humans.
One obvious repetition is the code used to get the position of the servo. So I started with that. Next it made sense to do the same for the move request too, since that was a similar command to the get position request. Finally I added a get servo ID method to find out the IDs of the connected servos when I don’t know them.
Phase 3 - Creating Abstractions
Now we have everything in helper methods, we’re not repeating much code. But now the file is over 100 lines long and it feels like we’re starting to lose structure. It’s at this point where I start to think about creating some abstractions. Then if the abstractions are decoupled enough, I can move them to another file.
This is not an easy task. You can only learn how to design good abstractions by doing and takes years to master. It is difficult to design abstractions that hide enough detail whilst remaining simple to understand. Many beginners tend to overdo the abstractions, creating far too many too early, which makes their code harder to understand, not easier. Try to balance the need for abstractions with the amount of structure you have in your code. Minimise the number abstractions to the point where you begin to lose structure.
It’s hard for me to describe. Other pros can articulate the problem much better. But this is how I judge it; I’m balancing the feeling of being crushed by the weight of code against my stress trying to understand it. But since I’m the one writing the code it’s hard for me to detach myself and remember what it feels like to look at this code for the first time.
First Abstractions
Looking at the most recent version of the code I can summarise that there are two types of code: one low-level type that communicates with the servos, and a high-level type that helps me perform actions. I decide to call these two types protocol code and controller code.
I can also think about the entities involved in the operation of the servo. Some are physical, like the servo itself. Others are virtual like the serial communication. This is where domain driven design and other accepted paradigms come into play. But I find that these tend to produce an excessive number of abstractions.
The previous two descriptions represent two ways of solving the same problem. I find that it is a combination of these two approaches that lead to the best abstractions. The first ensures that we are only designing abstractions that are needed by the code. The second is a theoretical approach that helps design better boundaries and promote cohesion.
There’s also a technical reason for the abstractions. If you look at the code you’ll see that the serial communication is basically a global. This is untestable. We need to figure out a way of injecting that so we can mock it out in the tests.
After a bit of tinkering I decided that a Servo abstraction was essential. It not only encapsulated the high-level controller code, it reflected a real-life entity. This passes the test of both being useful and real. We could split it down further and have a pure servo entity, and separate out the commands CQS-style. But I think that’s overkill at this stage. I will consider this later.
But I struggled a little to decide on how the Servo communicates. Should it use the serial directly? Or should it not concern itself with the underlying protocol? At this point I’m not entirely convinced. My experience tells me that I need to abstract the serial away (what if we want to control it over TCP, for example?) but for now I’m letting it fly. So this means that I am passing the serial object into the Servo.
Second Attempt
After my first attempt at creating the Servo abstraction I wasn’t entirely happy with way that an instance of a Servo didn’t really represent a real servo because it was constantly having an existential crisis. It had to query the ID every time we wanted to perform a command. I feel like the ID of a servo is a concrete element of the entity, so I want that fixed. Compare this to something like a position, which isn’t fixed. If we don’t know the ID we should have another way of constructing it. This was a minor change but would have had big ramifications later on.
Abstracting Out the Protocol
Ok so now the bit at the top of the file is getting annoying. It’s occluding the coolness of our new abstractions. So now I want to think about how to improve this. First off, let’s move those constants into another file. But hang on, before we do, we’ll need a better file structure, otherwise python won’t like the import. So now I take the time to add a proper Python application structure.
With that out of the way I can create a new protocol.py file that hides all of the packet building and parsing. This is trickier than it sounds because at the moment non of the protocol code touches the serial communication. This is nice in a way, because it decouples the protocol from the serial mechanism. But then again it feels like the Servo class is doing too much; building, writing, reading, parsing. How can I reduce the burden? How can I separate the protocol from the servo?
Looking at the code again I can see that there are two basic communication patterns. A command, like when I set the position, and a query - a command and a response - like when I get the position. I can hide this inside a Protocol class and pass the serial communication there instead. This includes a little bit of fanciness in the command function, but doing it this way allows me to pass optional data. Then I can reuse the command function inside the query function.
Next I hid the packet creation functionality inside the protocol class.
Phase 4 - Separating Classes
Now that I have two clean abstractions, Servo and Protocol, I’m ready to move the code to separate files. We want to do this for three reasons.
- With the boundary clearly separated, you don’t need to look at the protocol code to understand the servo code or vice-versa.
- By splitting into separate files this makes the number of lines in a file small.
- Makes it easier to unit test.
After this move you can see that the main file is nearly empty now. Before I do any more to this library, now is the time to add unit tests.
Adding Tests
People might call me mad for waiting until now to add tests. I don’t think I am, because the architecture has been rapidly changing. Having tests before this point would have multiplied my workload because each time I made a change, I’d have to fix the tests. I find this in my work too; most of the time I’m learning and figuring stuff out. Only when the design is finalised and is being released into production/public, should you add tests. Before then, in my opinion, is a waste of keystrokes.
Now I have added tests, which was fairly straightforward using mocks thanks to the abstractions and injecting the control classes, I’m ready to start adding more functionality to the Servo class. This is just a process of going through the datasheet and adding more detail. I won’t bore you with all of those changes.
Phase 5 - Release
Now that it’s in some semblance of a working state, it’s time to release it to the world. Note that it doesn’t have to be perfect. You don’t need perfect documentation, 100% tests, full functionality. That will come with time. If you use your library or other people do, requests for updates will come and you can update them then.
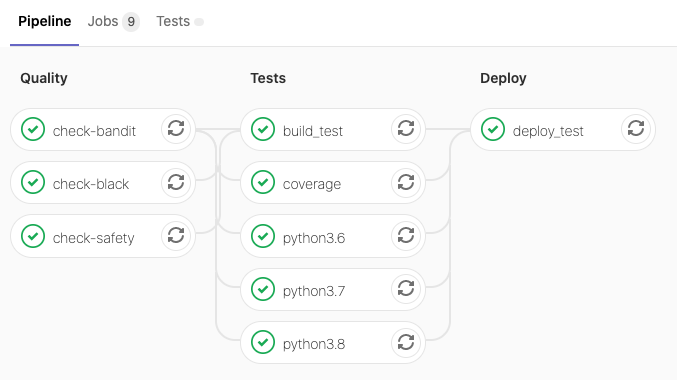
The next most important thing is to get your build pipeline up and running so you can push to pypi. This is beyond the scope of this article so I won’t go into details here. After I re-worked my way through the intricacies of Python testing, building and Gitlab’s CI/CD, I finally had a working pipeline. This pushed version 0.0.1 to pypi.
Conclusion
The goal of this post was to provide a first hand account of what end-to-end development of a Python library looks like, with all of the debugging that goes along the way. Too often people assume developers go from zero to uber-popular library in no time at all. But in reality, there is a significant amount of debugging, hair-pulling and coffee that goes along the way.
Notice how long it took before I started separating code. Just like with microservices, it is much easier to split code apart at the right time than it is to merge it back together again. Always put off splitting code apart until it is glaringly obvious the domains are different.
This took me a full day. Considering I was writing this post at the same time I don’t think that is too bad. If I was doing this without the blog post I probably would have skipped a few sections and gone straight to the abstractions. But I can’t guarantee that they would be the same abstractions and this process has convinced me that what I have now are good.